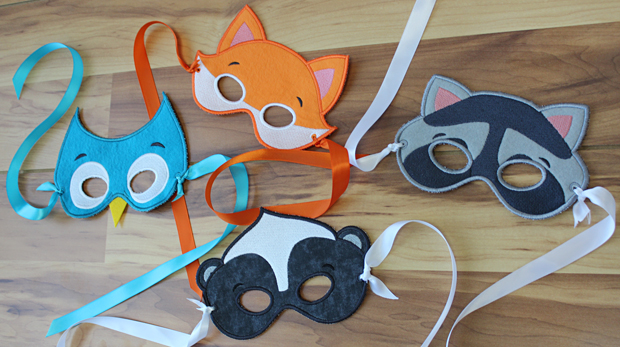
In-the-hoop wearable masks use fabric to fill open areas and add a back to their designs. The result is a fun and friendly mask that is fabulous for dress up, birthday parties, Halloween, and more. Follow these tips and tricks to learn how to embroider an in the hoop party mask.
Project Needs & Notes
– Felt, flannel, or ultra suede
– Small piece of stiff felt
– Medium-weight (2.5 ounce) cutaway stabilizer
– Tear-away stabilizer
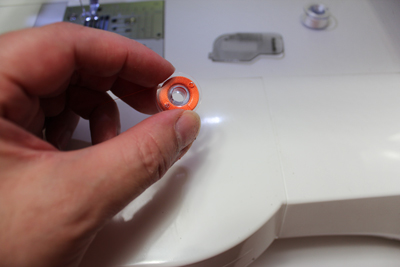
– Temporary spray adhesive (like Gunold KK100)
– 1/2″ – 5/8″ wide ribbon
– Large eye tapestry needle
– Small sharp scissors or craft knife and cutting pad
Find even more in-the-hoop mask designs here.
Sizing Notes:
The masks are available in three different sizes: large, medium, and small. Use the chart below for choosing the appropriate size. Measure between the pupils of the eyes (this will ensure that the eye holes will sit properly when the mask is worn):
Large: 3 3/16″
Medium: 2 3/4″
Small: 2 3/8″
Cut ribbon ties according to mask size (see below):
Large: two 29″ lengths
Medium: two 24 1/2″ lengths
Small: two 20″ lengths
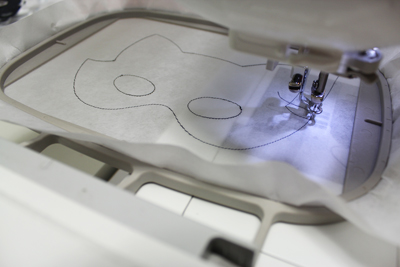 Hoop a piece of tear-away stabilizer. Load the full embroidery file and attach the hoop to the machine. Embroider the design. The first thing to stitch is a dieline.
 Place the fabric piece right inside the shape.
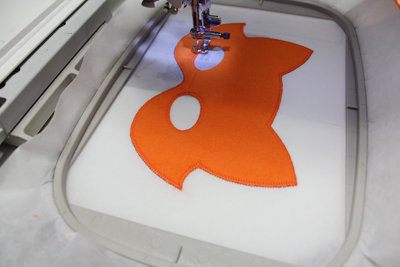 Attach the hoop back onto the machine and continue with the design. A tackdown stitch, also called a zigzag stitch, will sew next. This will bind the fabric to the stabilizer.
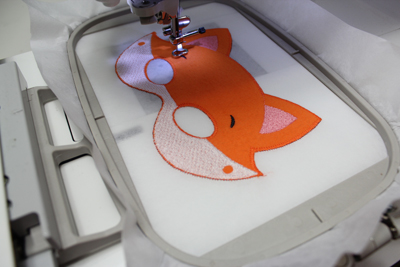 Other elements of the design will sew. Watch for a note on the color change sheet that says “back piece tackdown”. When you reach this step, remove the hoop from the machine and turn it over to the backside.
Attach the hoop back onto the machine and continue sewing. Another tackdown will stitch. This binds the back piece (and any other additional pieces) to the front piece.
 For the remaining steps, since both sides of the mask will be visible, I wound a bobbin (or bobbins if there are more than one color remaining) with the same color I am using in the needle.
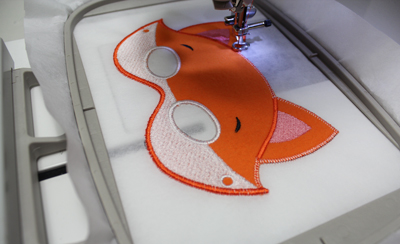 Satin stitch borders will sew next to finish off the mask.
 After the design has finished, tear away the stabilizer from inside the eye holes and around the outer edges of the mask.
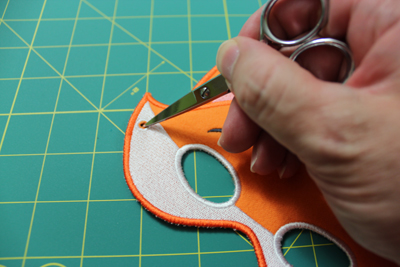 Using a small sharp scissors or craft knife, lay the mask on top of a cutting pad and poke holes in the center of the ribbon holes on each side of the mask.
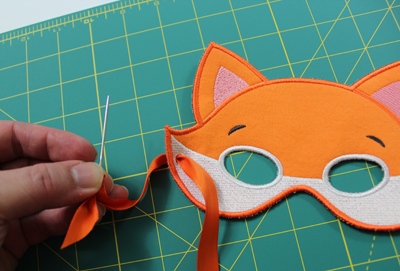 Thread one end of the ribbon through a large eye tapestry needle and work the ribbon through one of the ribbon holes. Tie that end of the ribbon in place with a knot and trim the ribbon.
 Cut the ribbon to the desired length (see above) and repeat for the opposite side of the mask to finish.
| Stitching tips for in-the-hoop masks: |
| Fabric | Felt, flannel, and ultra suede all work well with in-the-hoop masks. These fabrics are sturdy, so they hold up well when stitching and through wear. They are also soft which makes the mask comfortable to wear. |
| Cleaning | To clean the masks, use a soft cloth soaked in cold water — gently brush the mask to remove spots or dirt. You can also use a small bit of mild detergent if needed. Machine or hand washing is not recommended |